

 Removing skirting boards might seem like a straightforward task, but if done incorrectly, you could easily end up with unnecessary damage to your walls. Whether you’re refreshing your decor or replacing old skirting, knowing how to remove skirting boards without causing damage is essential. This guide offers a careful step-by-step process to help you get it done correctly and efficiently.
Why Care About Your Walls?
Walls take much of the visual space in a room, and any dents, holes, or peeling paint from careless skirting board removal can create an eye sore—not to mention extra time and expense in repairs. By being prepared and deliberate in your approach, you can avoid the frustration of cracked plaster and chipped walls.
Tools You’ll Need
Before you begin, make sure you gather all the necessary tools. Using the right equipment ensures you can complete the task smoothly without damaging the walls or skirting board.
- Pry bar or crowbar
- Hammer or mallet
- Utility knife
- Protective gloves
- Wide putty knife
- Dust sheet or floor protection
- Adhesive remover (optional)
Having everything ready ensures the process isn’t interrupted, especially when precision is required.
Step-by-Step Guide
Follow these steps carefully to remove skirting boards without damaging your walls or the boards themselves.
Step 1. Prepare the Work Area
Start by clearing the space around the skirting board. Remove any furniture, appliances, or floor rugs that might get in the way. Use a dust sheet to protect your flooring. This will keep things clean, especially if there’s old paint or adhesive that could flake off during removal.
Step 2. Cut Along the Edges
Run a utility knife along the edge where the skirting board meets the wall to break the seal of paint or caulk. This step is crucial, as skipping it could cause the paint or plaster to tear when you pry the skirting away. Take your time here—precise cutting ensures a cleaner removal process.
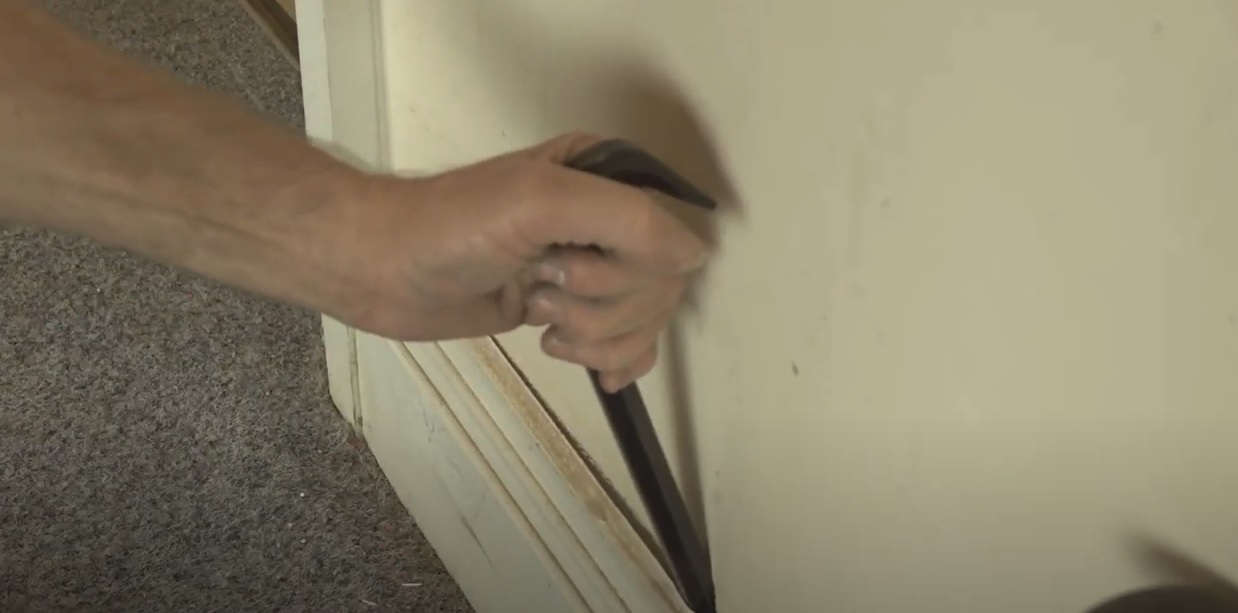
Step 3. Loosen the Skirting Board
Using your pry bar or crowbar, position it between the skirting and the wall. Slide in a wide putty knife first as a protective barrier so that the pry bar doesn’t dent the wall. Gently lever the skirting board away from the wall, starting at one end and working evenly along the length. Small, consistent movements work best to reduce pressure on any single section, minimizing damage.
Step 4. Work Incrementally
Avoid rushing. Carefully remove the board in sections rather than tearing it off all at once. If the skirting is particularly stubborn due to years of adhesive or nails, it’s better to take smaller steps. Using a hammer to gently tap the pry bar may help if needed, but continue to protect the wall with the wide putty knife as a buffer.
Step 5. Remove Remaining Nails or Adhesive
Once the skirting board is off, look for any nails still embedded in the wall. Use pliers or the back end of your hammer to remove them. If there’s residual adhesive, use an adhesive remover or gently scrape it away with a putty knife. Take care not to damage the plaster beneath.
Step 6. Check for Wall Damage
Inspect your wall for any signs of minor damage after removing the board. If there are small imperfections such as dents or chipped plaster, these can be easily fixed with filler or putty. This ensures the surface is ready for new skirting or a fresh coat of paint.
Tips for a Smooth Removal
- Start Small: Always start with a small section before tackling a larger length. This allows you to gauge how firmly the skirting is attached and adjust your method if needed.
- Go Slow: Rushing the process increases the risk of accidental damage.
- Protect Wall Finishes: Even if you’ve taken precautions, keep a close eye on the wall as you pry the skirting board away.
- Reuse with Caution: If you plan to reuse the skirting boards, handle them gently during removal to avoid splitting or damage.
Why This Matters
Removing skirting boards without causing damage isn’t just about keeping your walls intact—it’s about reducing stress and creating a better result for your home improvement projects. Whether you’re replacing them with a more modern design or simply refinishing your walls, starting on the right foot makes all the difference.